| Battle of Britain | |||||||
|---|---|---|---|---|---|---|---|
| Part of World War II | |||||||
 Heinkel He 111 over London, 7 September 1940 | |||||||
| |||||||
| Combatants | |||||||
United Kingdom |
Germany | ||||||
| Commanders | |||||||
| Hugh Dowding | Hermann Göring Albert Kesselring | ||||||
| Strength | |||||||
| initially 700; grew to nearly 1000 by the end of the Battle. | 1,260 bombers, 316 dive-bombers, 1,089 fighters | ||||||
| Casualties | |||||||
| 1,547 aircraft, 27,450 civilians dead, 32,138 wounded | 2,698 aircraft | ||||||
| Western Front (World War II) |
|---|
| France - The Netherlands - Dunkirk - Britain - Dieppe - Villefranche-de-Rouergue - Normandy - Dragoon - Arnhem - Scheldt - Hurtgen Forest - Aachen - Bulge - Plunder - Varsity - Aintree |
One of the major campaigns of the early part of World War II, the Battle of Britain is the name commonly given to the attempt by the German Luftwaffe to gain air superiority over the Royal Air Force (RAF), before a planned sea and airborne invasion of Britain (Operation Sealion). Neither Hitler nor the German Wehrmacht believed it possible to carry out a successful amphibious assault on the British Isles until the Royal Air Force had been neutralised. Secondary objectives were to destroy aircraft production and ground infrastructure, as well as terrorising the British people with the intent of intimidating them into seeking an armistice or surrender and attacking areas of political interest.
British historians regard the battle as running from 9 July to 31 October 1940, which represented the most intense period of daylight air raiding. German historians begin the battle in mid-August 1940 and end it in May 1941, on the withdrawal of the bomber units in preparation for the attack on the USSR. The failure of Nazi Germany to destroy Britain's air forces to allow for an invasion or to break the spirit of either the British government or people is widely considered the Third Reich's first major defeat.
Some historians have argued that no invasion could have succeeded given the massive superiority of the Royal Navy over the Kriegsmarine; Sealion would have been a disaster. They argue that the Luftwaffe would have been unable to prevent decisive intervention by RN cruisers and destroyers, even with air superiority. [1]
An Italian expeditionary force called Corpo Aereo Italiano also took part in the latter stages of battle on the German side. The Battle of Britain was the first major battle to be fought entirely in the air. It was the largest and most sustained bombing campaign yet attempted and the first real test of the strategic bombing theories that had emerged since the previous World War.
Background[]
Following the British evacuation from Dunkirk and the French surrender in June 1940, the Germans were uncertain what to do next on the military front. Hitler believed the war was practically over and that the British, defeated on the continent and without European allies, would quickly be forced to come to terms with Germany. Although there was a strand of British public and political sentiment that favoured a negotiated peace with a clearly ascendant Germany, the recently-installed British Prime Minister Winston Churchill nonetheless refused to consider an armistice with the Nazis. Churchill's skilful use of rhetoric hardened public opinion against a peaceful resolution and prepared the British for a long war. Simultaneously coining the general term for the ensuing battle, Churchill stated in a speech to the House of Commons on 18 June 1940, that:
What General Weygand called the Battle of France is over. I expect that the Battle of Britain is about to begin. Upon this battle depends the survival of Christian civilization. Upon it depends our own British life, and the long continuity of our institutions and our Empire. The whole fury and might of the enemy must very soon be turned on us. Hitler knows that he will have to break us in this Island or lose the war. If we can stand up to him, all Europe may be free and the life of the world may move forward into broad, sunlit uplands. But if we fail, then the whole world, including the United States, including all that we have known and cared for, will sink into the abyss of a new Dark Age made more sinister, and perhaps more protracted, by the lights of perverted science. Let us therefore brace ourselves to our duties, and so bear ourselves that, if the British Empire and its Commonwealth last for a thousand years, men will still say, "This was their finest hour."
The British rejection of German terms was therefore emphatic. Recognising this - and in an effort to finish the war in the West - Hitler subsequently ordered the rapid preparation of an invasion plan against Britain on 16 July. Hitler hoped perhaps to frighten Britain into peace before an actual invasion was launched, and used the invasion preparations as a means to apply pressure. The plan was prepared by the OKW (Armed Forces High Command). The operation, code-named Seelöwe (Sea Lion), was planned for mid-September 1940 and called for landings on the south coast of Great Britain, backed by an airborne assault. All preparations were to be made by mid-August.
The Kriegsmarine was reluctant to launch an invasion, and on 11 July, Admiral Raeder told Hitler that invasion could only be contemplated as a last resort, and only then with full air superiority. The Kriegsmarine had a limited number of ships, while the Royal Navy had over 50 destroyers and dozens of cruisers and battleships in home waters. Nevertheless, Hitler was determined that the invasion plan would go ahead, and ordered all services to make preparations for an amphibious assault once air superiority had been achieved. With control of the air, the Luftwaffe would have at least a chance of preventing Royal Navy interference.
Therefore, the first task was to win air superiority. A plan was hatched to attack RAF airfields and aircraft production centres. The Luftwaffe commander, Reichsmarschall Hermann Göring called his plan Adlerangriff (Eagle Attack), which would begin on 11 August, or Adlertag (Eagle Day), with an all-out attack. The attack had been scheduled to begin 9 days earlier, on the 2nd, but bad weather meant that it had to be postponed.
Before the start of Adlertag, the Luftwaffe spent a month attacking convoys in the English Channel. This period of fighting was called Kanalkampf (Channel Battle) by the Germans and was used to test the RAF's defences and to lure their fighter aircraft up for a battle of attrition. The RAF thus dates the beginning of the battle from the first convoy attacks on 10 July 1940.
Luftwaffe strategy[]
The German strategy was influenced by pre-war theories of strategic bombing that stressed the weakness of air defence and the effects of terror bombing on public morale. After the Spanish Civil War, the emphasis of German air operations had shifted toward a more tactical force. In Poland and France, the Luftwaffe had operated jointly with the Wehrmacht in its Blitzkrieg or "lightning war". In the Battle of Britain, however, the Luftwaffe had to operate alone, not as support for an advancing army but as a decisive weapon in its own right. There remained a strong belief in the power of strategic bombing and the battle was seen by Göring as an opportunity to prove what his air force could do.
At the same time, the Luftwaffe was facing an opponent the likes of which it had not met before: a sizable, highly-coordinated, well-supplied air force, fielding aircraft every bit the match for the German Bf-109 and Bf-110. The majority of the RAF's fighting would rest upon the workhorse Hurricane Mk I. More shocking to the German pilots was the newer Spitfire Mk I, which was quickly recognised as a nimble, world-class fighter. The fighters they had encountered thus far in the war did not, despite strong showings by their pilots, measure up to the performance of the German Bf-109. Only the Spitfire was in a similar class.
The Luftwaffe regrouped after the Battle of France into three Luftflotten (Air Fleets) on the UK's southern and northern flanks. Luftflotte 2, commanded by Generalfeldmarschall Albert Kesselring, was responsible for the bombing of southeast England and the London area. Luftflotte 3, under Generalfeldmarschall Hugo Sperrle, targeted the West Country, Midlands, and northwest England. Luftflotte 5, led by Generaloberst Hans-Jürgen Stumpff from his headquarters in Norway, was unleashed against the north of England and Scotland. As the battle progressed, command responsibility shifted, with Luftflotte 3 taking more responsibility for the night Blitz while the main attack fell upon Luftflotte 2's shoulders. Late in the battle, an Italian expeditionary force, the Corpo Aereo Italiano, briefly joined the fighting.
Initial Luftwaffe estimates allotted four days to defeat the RAF's Fighter Command in southern England, followed by four weeks for the bombers and long-range fighters to mop up the rest of the country and destroy the UK's aircraft industry. The plan was to begin with attacks on airfields near the coast, gradually moving inland toward London and the ring of Sector airfields defending it.
The Luftwaffe kept broadly to this scheme, but its commanders had differences of opinion on strategy. The commander of Luftflotte 3, Hugo Sperrle, wanted to eradicate the air defence infrastructure by bombing. His counterpart in Luftflotte 2, Albert Kesselring, championed attacking London directly—either to bombard the British government into submission or to draw RAF fighters into a decisive battle. Göring did nothing to resolve this disagreement between his commanders, obsessed as he was with maintaining his own power base in the Luftwaffe and indulging his outdated beliefs on air fighting, which were later to lead to tactical and strategic errors.
The Luftwaffe was ill-served by its lack of intelligence on the British defences. The German intelligence services were fractured, driven by rivalries and their overall performance was amateurish. By 1940, there were few if any German agents operating in the UK and a handful of bungled attempts to insert spies into the country were foiled. This meant that the Luftwaffe had almost no recent knowledge of the workings of the RAF's air defences, in particular of the crucial command and control system that had been built before the war. Even when good information existed, such as 5th Abteilung's November 1939 assessment of Fighter Command strengths and capabilities, it was ignored if it did not match conventional preconceptions.
Throughout the battle, the Luftwaffe was plagued by poor intelligence; as a result, the Luftwaffe had to launch numerous reconnaissance sorties. The Dornier 17s proved easy prey for British fighters, even though for the better part of the battle, they were escorted by a whole squadron of Messerschmitt Me 109s. As a result, for much of the battle, the Luftwaffe operated 'blind', unaware of their enemy's true strengths, capabilities and deployments. Many times the leadership believed that the Fighter Command's strength had collapsed, while raids against supposed fighter airfields fell instead on bomber or coastal defence installations. The results of bombing and air fighting were exaggerated, resulting in the Luftwaffe leadership becoming increasingly disconnected from reality. This lack of leadership and solid intelligence meant that the Germans did not adopt any consistent strategy, even when the RAF had its back to the wall.
The Dowding System[]
The Battle of Britain campaign made the eight-gun monoplane fighters of the RAF—the Spitfire and Hurricane—into legends. The keystone of the British defence, however, was the complex infrastructure of detection, command, and control that ran the battle. This was known as the 'Dowding System' after its chief architect, Air Chief Marshal Sir Hugh Dowding, the leader of RAF Fighter Command.
Groups[]
The UK's airspace was divided up into four Groups.
- 10 Group defended Wales and the West Country and was commanded by Air Vice-Marshal Sir Christopher Quintin-Brand.
- 11 Group covered the southeast of England and the critical approaches to London and was commanded by Air Vice-Marshal Keith Park.
- 12 Group defended the Midlands and East Anglia and was led by Air Vice-Marshal Trafford Leigh-Mallory.
- 13 Group covered the north of England, Scotland and Northern Ireland and was commanded by Air Vice-Marshal Richard Saul.
At the HQ of each Group (e.g. for 11 Group RAF Uxbridge) information from Fighter Command headquarters would be noted on plotting tables, large maps on which counters marking the incoming raids would be moved, and RAF officers known as Fighter Controllers could then order a response.
Sectors[]
The Group areas were subdivided into Sectors; each commanding officer was assigned between two and four squadrons. Sector stations, comprising an aerodrome with a command post, were the heart of this organisation, though they also had satellite airfields to disperse squadrons to. When ordered by their Group HQ, the sector stations would 'scramble' their squadrons into the air. Once airborne, the squadrons would be commanded by radio-telephone (R/T) from their sector station. Squadrons could be ordered to patrol airfields or vital targets, or be 'vectored' to intercept incoming raids.
Limitations[]
Though it was the most sophisticated air defence system in the world at that time, the Dowding System had many limitations, including, but not often stressed, its emphatic need for qualified ground maintenance personnel, many of whom had received their training under the Aircraft Apprentice scheme instituted by Hugh Trenchard. The RDF radar was subject to significant errors and the Observer Corps had difficulties tracking raids at night and in bad weather. R/T communications with airborne fighters were restricted because of the RAF's use of High-Frequency (HF) radio sets. HF radio was limited in range and even with a network of relay stations, the squadrons could not roam more than one or two sectors from their airfields. It was also restricted to a single frequency per squadron, making inter-squadron communication impossible. Finally, the system for tracking RAF fighters, known as HF/DF or "Huff-Duff", restricted sectors to a maximum of four squadrons in the air.
Efficiency[]
In spite of this, RAF Fighter Command was able to achieve high levels of efficiency, at times achieving interception rates greater than 80%. The R/T problems were solved late in the battle with the adoption of Very High-Frequency (VHF) radio sets, which gave clearer voice communications, had longer range, and provided multiple channels. For all of its faults, the RAF's system of ground control directed its fighters to be where they were needed. The Luftwaffe, with no such system, was always at a disadvantage.
Effect of signals intelligence[]
It is unclear how much the British intercepts of the Enigma cipher, used for high-security German radio communications, affected the battle. Ultra, the information obtained from Enigma intercepts, gave the highest echelons of the UK's command a view of German intentions but it seems that little of this material filtered down to Hugh Dowding's desk. However, the 'Y' radio listening service, monitoring the patterns of Luftwaffe radio traffic, contributed considerably to the early warning of raids.
Battle of the beams[]
- See Battle of the beams
While the British were using radar more effectively than the Germans realised for air defence, the Luftwaffe had their own electronic means to increase their air attacks' effectiveness. One of the systems was called Knickebein ("crooked leg"), a system where carefully positioned radio transmitters in friendly territory broadcast specially targeted navigational beams that intersected over specific bombing targets in enemy territory. Bombers equipped with technology to detect these beams could be guided towards a target and receive a signal to drop their bombs when they were (roughly) overhead. This allowed for somewhat more accurate bombing at night when British air defence was at its weakest.
Although British intelligence had heard of proposals for this system they were not taken seriously until a British science advisor to MI6, Reginald Victor Jones, gathered evidence of its existence and its threat. He then convinced the high command of the menace and confirmed it with special reconnaissance flights. Jones was put in charge of developing countermeasures which often involved interfering with the beams to make attacking aircraft go widely off course. Although the Germans resorted to other navigational systems, Jones and the Telecommunications Research Establishment (TRE) were able to neutralise each in turn. The result was markedly reduced precision bombing effectiveness for the Germans. With the beams no longer accurate, however, many civilian areas that would not normally have been targeted were bombed.
Luftwaffe tactics[]
The Luftwaffe varied its tactics considerably to try to find a way through the RAF defences. It launched many free-roving fighter sweeps, known as Freie Jagd or "Free Hunts" to try to draw up RAF fighters. RAF fighter controllers, however, were often able to detect the free hunts and manoeuvre squadrons around them to avoid a direct encounter. The Luftwaffe also tried using small formations of bombers as bait, covering them with large numbers of escorts. This was more successful, but escort duty tied the fighters to the bombers' slow speed and made them more vulnerable. Casualties were greatest among the escort units.
Standard tactics for raids soon became an amalgam of techniques. A free hunt would precede a raid to try to sweep any defenders out of the raid's path. The bombers would then fly in at altitudes between 10,000 and 16,000 feet, sometimes closely escorted by fighters. A 'detached' escort, or 'top cover' would fly above the bombers and maintain a distant watch.
Luftwaffe tactics were influenced by their fighters, which were divided into single-engined Me 109s and twin-engine Me 110s. The Me 110 Zerstörer (Destroyer fighters) proved to be too vulnerable to the nimble single-engined RAF fighters. Soon, they had to be given escorts of their own and were eventually restricted in their employment. This meant that the bulk of fighter duties fell on the Me 109. Fighter tactics were then complicated by the Luftwaffe bomber crews who demanded closer protection against the RAF. Because they had his ear after the hard-fought battles of 15 August and 18 August, Göring was only too pleased to order an increase in close escort duties. This shackled many Me 109s to the bombers and, though they were more successful at protecting the bombing forces, casualties amongst the fighters mounted.
RAF tactics[]
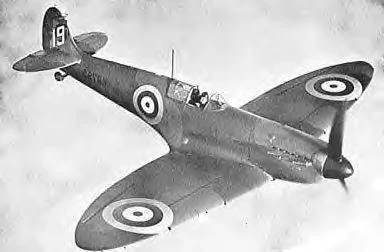

An RAF Spitfire shortly before World War II.
The weight of the battle fell upon the RAF's 11 Group. Keith Park's tactics were to dispatch individual squadrons to intercept raids. The intention was to subject attackers to continual attacks by relatively small numbers of aircraft and try to break up the tight formations of bombers. Once formations had fallen apart straggling bombers could be picked off one by one. Where multiple squadrons reached a raid the procedure was for the slower Hurricanes to tackle the bombers while the more agile Spitfires held up the fighter escort. This ideal was not always achieved, however, and sometimes the Spitfires and Hurricanes reversed roles.
In the early phases of the battle the RAF was hamstrung by its reliance on obsolete fighting drills. These restricted their squadrons to tight 12 aircraft formations composed of three-aircraft "sections" in tight "V's" nicknamed 'vics'. With four sections flying together in tight formation only the squadron leader at the front was free to actually watch for the enemy; the other pilots had to concentrate on him and each other. RAF fighter training also emphasised by-the-book attacks by sections breaking away in sequence. The German pilots dubbed the RAF formations "Idiotenreihen" ("rows of idiots") because they left squadrons vulnerable to attack. They employed the looser and more flexible four-ship 'Schwarme' developed in the Spanish Civil War, using two pairs each consisting of leader and wingman. The frontline RAF pilots were acutely aware of the inherent deficiencies of their own tactics. However, they could not radically change them as arriving replacement pilots, often with only minimal actual flying time, could not be readily retrained in the midst of battle. A compromise was adopted whereby squadron formations used much looser formations with one or two aircraft flying independently above and behind ( dubbed 'weavers') to provide increased observation and rear protection. After the battle RAF pilots adopted a variant on the German formations with some success[2].
The fact that 'sweeps' by German fighters not escorting bombers were often ignored by fighter command seems to reinforce the idea that Dowding sought always to preserve his fighter force to fight another day.
A Hawker Hurricane at the Smithsonian Institution's National Air and Space Museum.
During the battle, some commanders, notably Trafford Leigh-Mallory of 12 Group, proposed that squadrons should be formed into Big Wings, consisting of at least three squadrons, to attack the enemy en masse, a method pioneered by the legless pilot Douglas Bader. Proponents of this tactic claimed that interceptions in large numbers caused greater enemy losses while reducing their own casualties. Opponents pointed out that the big wings would take too long to form up, and that the strategy ran a greater risk of fighters being caught on the ground refuelling. The big wing idea also caused pilots to over-claim their kills, due to the confusion of a more intense battle-zone. This led to the media belief that the big wings were far more effective than they actually were.
The issue caused intense friction between Park and Leigh-Mallory, as Leigh-Mallory's 12 Group were tasked with protecting 11 Group's airfields whilst Park's squadrons intercepted incoming raids. However, the delay in forming up Big Wings meant that this air cover often did not arrive until after German bombers had hit 11 Group's airfields. Post-war analysis agrees that Dowding and Park's approach was best for 11 Group. However, the controversy affected Park's career after the battle and contributed to Dowding's dismissal from Fighter Command.
Phases of the Battle[]
The Battle can be roughly divided into four phases:
- 10 July – 11 August: Kanalkampf, the Channel battles.
- 12 August – 23 August: Adlerangriff, the early assault against the coastal airfields.
- 24 August – 6 September: the Luftwaffe targets the airfields. The critical phase of the battle.
- 7 September onwards: the day attacks switch to British towns and cities.
Kanalkampf.[]
A pair of 264 Squadron Defiants. (PS-V was shot down on 28 August 1940 over Kent by Bf 109s.)
The Kanalkampf comprised a series of running fights above convoys of freighter vessels speeding through the English Channel. In general, these battles off the coast tended to favour the Germans, whose bomber escorts massively outnumbered the convoy patrols. Eventually, the number of ship-sinkings became so great that the British Admiralty cancelled all further convoys through the Channel. However, these early fights provided both sides with experience. They also gave the first indications that some of the aircraft, such as the RAF's Defiant turret-fighter and the Luftwaffe's Me 110, were not up to the intense dog-fighting that would characterise the battle.
Adlerangriff[]
The weather, which was to prove an important feature of the campaign, delayed Adlertag, or Eagle Day until 13 August. But on the 12th the first attempt was made to blind the Dowding system when aircraft from the specialist fighter-bomber unit Erprobungsgruppe 210 attacked four radar stations. Three stations were briefly taken off the air but were back working within six hours. The raids appeared to show that the British radars were difficult to knock out for any length of time. The Luftwaffe's failure to mount repeated attacks on them allowed the RAF to get the radar stations back on the air.
Adlertag opened with a series of attacks on coastal airfields, used as forward landing grounds for the RAF fighters. As the week drew on, the airfield attacks moved further inland and repeated raids were made on the radar chain. 15 August saw "The Greatest Day" when the Luftwaffe mounted the largest number of sorties of the campaign. This day saw the one major intervention by Luftflotte 5 in the battle with an attack on the north of England. Believing the strength of Fighter Command to be concentrated away in the south, raiding forces from Denmark and Norway ran into strong resistance. Inadequately escorted by long-ranged Me 110 Zerstörers, the bombers were shot down in large numbers. As a result of the casualties Luftflotte 5 would not appear in strength again in the campaign.
The eighteenth of August, which saw the greatest number of casualties to both sides, has been dubbed "The Hardest Day". Following the grinding battles of the 18th, exhaustion and the weather reduced operations for most of a week, allowing the Luftwaffe to review their performance. "The Hardest Day" had sounded the end for the Ju 87 Stuka dive-bomber in the campaign. This veteran of the Blitzkrieg was simply too vulnerable to fighter attack over Britain and to preserve the Stuka force Göring withdrew it from the fighting. This removed the Luftwaffe's main precision-bombing weapon and shifted the burden of pin-point attacks on the already-stretched Erprobungsgruppe 210. But Göring was not finished: the Me 110 Zerstörer had proven itself too fragile for dog-fighting with single-engined fighters and its participation would also be scaled back. It would only be used when range required it or when sufficient single-engined escort could be provided.
Göring made yet another fateful decision: to order more bomber escorts at the expense of free-hunting sweeps. To achieve this the weight of the attack now fell on Luftflotte 2 and most of the Me 109 forces in Luftflotte 3 were transferred to Kesselring's command, reinforcing the fighter bases in the Pas de Calais. Stripped of its fighters, Luftflotte 3 would concentrate on the night bombing campaign.
Finally, Göring ordered the attacks on the radar chain stopped. The attacks were seen as unsuccessful and neither the technically inept Reichsmarschall nor his subordinates realised how vital the Chain Home stations were to the defence. It was known that radar provided some early warning of raids, but the belief amongst fighter pilots was that anything that brought up the 'Tommies' to fight was to be encouraged.
Luftwaffe targets RAF airfields[]
From 24 August onwards, the battle was essentially a slugging match between Kesselring's Luftflotte 2 and Keith Park's 11 Group. The Luftwaffe concentrated all their strength on knocking out Fighter Command and made repeated attacks on the airfields. Of the 33 heavy attacks in the next two weeks, 24 were against airfields. The key sector stations were hit repeatedly: Biggin Hill and Hornchurch four times each, Debden and North Weald twice each. Croydon, Gravesend, Rochford, Hawkinge and Manston were also attacked in strength. No fewer than seven attempts were made against Eastchurch, which was not a Fighter Command aerodrome but was believed to be by the intelligence-starved Germans. At times these raids knocked out the sector stations, threatening the integrity of the Dowding system. Emergency measures had to be taken to keep the sectors operating.
These were desperate times for the RAF, which was also taking many casualties in the air. Aircraft production could replace aircraft but replacement pilots were barely keeping place with losses, and novice flyers were being shot down in droves. Most replacements had as little as nine hours flying time and no combat training. At this point the multinational nature of the RAF came to the fore. With many pilots from the Dominions already serving in Fighter Command — Australians, South Africans, New Zealanders and Canadians — they were bolstered by the arrival of fresh Czechoslovak and Polish squadrons. These squadrons had been held back by Dowding, who mistakenly thought the non-English speaking aircrew would have trouble working within his control system. In addition there were other nationals, including Free French, Belgian and even a Palestinian Jewish pilot serving amongst the squadrons.
The RAF at least had the advantage of fighting over home territory. Pilots who bailed out of their shot-down aircraft could be back at their airfields within hours. For Luftwaffe aircrews, a bail out over England meant capture, while parachuting into the English Channel often meant drowning or death from exposure. Morale began to suffer and Kanalkrankheit or 'Channel Sickness' — a form of combat fatigue — began to appear amongst the German pilots. Their replacement problem was even worse than the British. Though the Luftwaffe always maintained its numerical superiority, the slow appearance of replacement aircraft and pilots put increasing strain on the resources of the remaining attackers.
And yet, the Luftwaffe was winning this battle of the airfields. Another fortnight of this pounding and the RAF might have been forced to withdraw their squadrons from the south of England. This was not clear to the Luftwaffe command, which had watched its bomber force start to waste away and had grown desperate to deliver on the original timetable. They could not understand why the RAF hadn't yet collapsed, or how they were always able to get fighters to the place they were needed, no matter how many raids were sent. Something needed to be done to force the RAF into a decisive battle.
On 4 September, Hitler ordered the Luftwaffe to bomb London, following RAF raids on Berlin on the night of 25–26 August, itself a reprisal after London and its suburbs had been damaged by bombs on several occasions in late August. The Berlin raid had hurt Göring's pride, as he had previously claimed the British would never be allowed to bomb the city. Kesselring seized his chance and proposed a strategy change. In the face of Sperrle's arguments that attacks on the airfields should continue, Kesselring persuaded the Reichsmarschall to attack London. The raids would either panic the British population into submission, or force the "last fifty Spitfires" into the sky where they could be annihilated. This attack was no longer seen as a prerequisite for Seelöwe, but was meant to be decisive in itself.
Raids on British Cities[]
Bombing of London.
For several months prior to 7 September, when the first major London raid was launched, the Luftwaffe had bombed a series of British cities, killing more than 1,250 civilians in July and August. The 7 September raid targeted docks in the East End of the city, and over the coming days massive raids were launched again and again: some targeting the docks but others bombing indiscriminately. The RAF did come up but in greater numbers than the Luftwaffe expected. The 12 Group Big Wing was deployed for the first time, giving the German pilots a fright. Over the coming days the attacks on London continued. The break from bombing the airfields gave the RAF critical breathing space. It was the turning point.
Without a doubt, the most damaging aspect of the switch to London was the longer range. The Me 109 escorts had a limited fuel capacity, and by the time they arrived over the city, they had only ten minutes of flying time before they had to turn for home. This left many raids completely undefended by fighter escorts. The Battle of Britain culminated on September 15 1940 with two massive waves of German attacks that were decisively repulsed by the RAF. The total casualties on this critical day was 60 German aircraft shot down versus only 26 for the RAF or a ratio of roughly 2:1 in favour of the RAF. The German defeat caused Hitler to order, two days later, the postponement of preparations for the invasion of Britain. Henceforth, in the face of mounting losses in men, aircraft and the lack of adequate replacements, the Luftwaffe switched from daylight bombing raids to night-time attacks instead. The threat of invasion was essentially over although the German night blitz on London and other British cities continued into 1941.
Aftermath[]
Overall, the Battle of Britain was a stalemate for both the Germans and the British, but it dramatically raised the morale of the Allied forces. The Battle of Britain marked the first time that the Nazis were stopped and that air superiority became clearly seen as the key to the war. Though the battle was small in the number of combatants and casualties, had the Germans triumphed the war would have taken a very different path. The British victory marked the first failure of Hitler's war machine. It also signaled a shift in U.S. opinion at a time when many people from the U.S. believed that the UK could not survive, a view promoted by Joseph Kennedy, the U.S. ambassador in London and father of John F. Kennedy, the future President of the United States.
Both sides in the battle made exaggerated claims of numbers of enemy aircraft shot down. In general, claims were two to three times the actual numbers, due to confusion in the whirling air battles. However, post-war analysis of records has shown that between July and September the RAF claimed over 2,698 kills for 1,023 fighter aircraft lost to all causes, while the Luftwaffe fighters claimed 3,198 RAF aircraft downed for losses of 1,887, of which 873 were fighters. The 147 Polish pilots scored 201 out of that number. To the RAF figure should be added an additional 376 Bomber Command and 148 Coastal Command aircraft that conducted vital bombing, mining and reconnaissance operations in defence of the country.
Modern military historians have suggested the battle was unwinnable for the Luftwaffe. Their numerical majority was not sufficient to achieve superiority. Dowding's and Park's strategy of choosing when to engage the enemy whilst maintaining a coherent force was totally vindicated.
The theories of strategic bombing, which hinged on the collapse of public morale, were undone by British defiance in the face of the day and night Blitzes. The switch to a terror bombing strategy allowed the RAF to recuperate and to defend against the attacks. Even if the attacks on the 11 Group airfields had continued, the British could have withdrawn to the Midlands, out of German fighter range, and continued the battle from there. Post-war records show that British aircraft were being replaced faster than those of the Germans; the RAF maintained its strength even as the Luftwaffe's declined. In losses of aircraft and experienced aircrew the battle was a blow from which the Luftwaffe never fully recovered.
The terror strategy in itself could not force the British to surrender. Even though the Germans launched some spectacular attacks against important British industries, they could not destroy the British industrial potential. But hindsight does not disguise the fact that the threat to the RAF was very real and for the participants, it seemed as if there was a "Narrow Margin" between victory and defeat. The victory was as much psychological as physical. It turned a tide of defeats and heartened the enemies of Nazism.
The British triumph in the Battle of Britain was not without heavy cost. Total British civilian losses from July to December 1940 were 23,002 dead and 32,138 wounded, with one of the largest single raids occurring on December 29 1940, in which almost 3,000 civilians died.
Winston Churchill summed up the effect of the battle and the contribution of the RAF in the immortal words: "Never in the field of human conflict was so much owed by so many to so few"[3]. Pilots who fought in the battle have been known as The Few ever since.
September 15 is celebrated in the United Kingdom as "Battle of Britain Day", marking the climactic battles witnessed above London in daylight.
In British military tradition, the Battle of Britain is remembered with at least as much pride as the Battle of Trafalgar or the Battle of Waterloo. In addition, the battle has entered popular legend around the world as an inspiring story of how a small island, standing alone against Nazi tyranny, managed to defeat a powerful enemy.
Most important, the end of the Battle of Britain allowed the UK to rebuild its military forces and establish itself as an Allied stronghold. Britain later served as a base from which Operation Overlord, aka the Battle of Normandy, was launched against Nazi forces in Europe.
Foreign contribution[]
See main article Battle of Britain Foreign Contribution
The RAF roll of honour for the Battle of Britain recognises[1] 510 overseas pilots as flying at least one authorised operational sortie with an eligible unit of the Royal Air Force or Fleet Air Arm between 10 July and 31 October 1940. This included pilots from Poland, New Zealand, Canada, Czechoslovakia, Belguim, Australia, South Africa, France, Ireland, United States of America, Jamaica, Palestine and Southern Rhodesia.
References[]
- ↑ Robinson, Derek: "Invasion 1940". Constable, 2005
- ↑ Spitfire Mark I/II Aces 1939–41 (Aircraft of the Aces 12) by Alfred Price, Osprey Books, Paperback Edition, November 15 1996, ISBN 1855326272 http://www.ospreypublishing.com/title_detail.php/title=P6272~ser=ACE
- ↑ Speech to the House of Commons on August 20 1940
Bibliography[]
- Bishop, Patrick. Fighter Boys: The Battle of Britain, 1940. New York: Viking, 2003 (hardcover, ISBN 0-670-03230-1); Penguin Books, 2004 (paperback, ISBN 0-14-200466-9). As Fighter Boys: Saving Britain 1940. London: HarperPerennial, 2004 (paperback, ISBN 0-00-653204-7).
- Brittain, Vera. England's Hour. London: Continuum International Publishing Group, 2005 (paperback, ISBN 0-8264-8031-4); Obscure Press (February 14, 2006 (paperback, ISBN 1-84664-834-3).
- Bungay, Stephen. The Most Dangerous Enemy: A History of the Battle of Britain. London: Aurum Press, 2000 (hardcover, ISBN 1-85410-721-6); 2002 (paperback, ISBN 1-85410-801-8).
- Craig, Phil; Clayton, Tim. Finest Hour: The Battle of Britain. New York: Simon & Schuster, 2000 (hardcover, ISBN 0-684-86930-6); 2006 (paperback, ISBN 0-684-86931-4).
- Fisher, David E. A Summer Bright and Terrible: Winston Churchill, Lord Dowding, Radar and the Impossible Triumph of the Battle of Britain. Emeryville, CA: Shoemaker & Hoard, 2005 (hardcover, ISBN 1-59376-047-7); 2006 (paperback, ISBN 1-59376-116-3).
- Foreman, John. Battle of Britain: The Forgotten Months, November And December 1940. Wythenshawe, Lancashire, UK: Crécy Publishing, 1989 (hardcover, ISBN 1-871187-02-8).
- Gaskin, Margaret. Blitz: The Story of December 29, 1940. New York: Harcourt, 2006 (hardcover, ISBN 0-15-101404-3).
- Haining, Peter. Where the Eagle Landed: The Mystery of the German Invasion of Britain, 1940. London: Robson Books, 2004 (hardcover, ISBN 1-86105-750-4).
- Hough, Richard. The Battle of Britain: The Greatest Air Battle of World War II. New York: W.W. Norton, 1989 (hardcover, ISBN 0-393-02766-X); 2005 (paperback, ISBN 0-393-30734-4).
- James, Brian. "Pie in the Sky?", History Today, September 2006, Volume 56, Issue 9, pp. 38–40
- Bishop, Patrick. "The Fighter Boys achieved a great military success", The Daily Telegraph, August 24, 2006
- Evans, Michael. "Never in the field of human conflict was so much owed by so many to . . . the Navy", The Times, August 24, 2006
- Gillan, Audrey. "Historians downgrade Battle of Britain", The Guardian, August 24, 2006
- Harding, Thomas. "It's baloney, say RAF aces", The Telegraph, August 24, 2006
- James, T.C.G. The Battle of Britain (Air Defence of Great Britain; vol. 2). London; New York: Frank Cass Publishers, 2000 (hardcover, ISBN 0-7146-5123-0; paperback, ISBN 0-7146-8149-0).
- James, T.C.G. Growth of Fighter Command, 1936–1940 (Air Defence of Great Britain; vol. 1). London; New York: Frank Cass Publishers, 2000 (hardcover, ISBN 0-7146-5118-4).
- James, T.C.G. Night Air Defence During the Blitz. London; New York: Frank Cass Publishers, 2003 (hardcover, ISBN 0-7146-5166-4).
- Overy, Richard. The Battle of Britain: The Myth and the Reality. New York: W.W. Norton, 2001 (hardcover, ISBN 0-393-02008-8); 2002 (paperback, ISBN 0-393-32297-1).
- Parry, Simon W. Intruders over Britain: The Story of the Luftwaffe's Night Intruder Force, the Fernnachtjager . Washington, DC: Smithsonian Books, 1989 (hardcover, ISBN 0-904811-07-7).
- Ray, John Philip. The Battle of Britain: Dowding and the First Victory 1940. London: Cassel & Co., 2001 (paperback, ISBN 0-304-35677-8).
- Ray, John Philip. The Battle of Britain: New Perspectives: Behind the Scenes of the Great Air War. London: Arms & Armour Press, 1994 (hardcover, ISBN 1-85409-229-4); London: Orion Publishing, 1996 (paperback, ISBN 1-85409-345-2).
- Robinson, Derek. Invasion, 1940: Did the Battle of Britain Alone Stop Hitler? New York: Carroll & Graf, 2005 (hardcover, ISBN 0-7867-1618-5).
- Wellum, Geoffrey. First Light: The Story of the Boy Who Became a Man in the War-Torn Skies Above Britain. New York: Viking Books, 2002 (hardcover, ISBN 0-670-91248-4); Hoboken, NJ: Wiley & Sons, 2003 (hardcover, ISBN 0-471-42627-X); London: Penguin Books, 2003 (paperback, ISBN 0-14-100814-8).
See also[]
- The Darkest Hour
- Battle of Britain Foreign Contribution
- The Blitz
- Bombing of Coventry
- British military history of World War II
- Royal Canadian Air Force
- Polish contribution to World War II
- The Few
- Battle of Britain Monument in London
- Kent Battle of Britain Museum
- Battle of Britain, theatrical release documenting the battle
External links[]
- Battle Of Britain
- Royal Air Force history
- British Invasion Defences
- Map of UK Airfields and squadrons.
- RAF Battle of Britain Roll of Honour
- Battle-Of-Britain Website.
- Battle-Of-Britain Website in Dutch.
- Royal Engineers Museum Royal Engineers and Second World War (airfield repair)
| World War II | ||||||||||
| Participants | Theatres | Main events | Specific articles | |||||||
|---|---|---|---|---|---|---|---|---|---|---|
|
The Allies • more... The Axis • more... |
Prelude Main theatres General timeline |
1939 1940 1941 1942 1943 1944 1945 • more... |
• Blitzkrieg Civilian impact and atrocities Aftermath | |||||||
| ||||||||||

|
This page uses content from Wikipedia. The original article was at Battle of Britain. The list of authors can be seen in the page history. As with WarWiki, the text of Wikipedia is available under CC-BY-SA. |